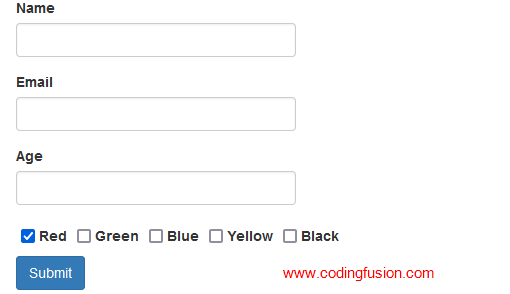
ASP.Net MVC is a powerful framework for building web applications, and one common requirement in web forms is to create a checkbox list that allows users to select multiple options. In this tutorial, we'll walk you through the steps to create a checkbox list in ASP.Net MVC using C#.
Step 1: Create Modal Classes
To get started, we'll create two modal classes: UserModal and CheckBoxListHelper. These classes will help us manage user data and the checkbox list options.
public class UserModal
{
    public string Name { get; set; }
    public string Email { get; set; }
    public int? Age { get; set; }
    public List<CheckBoxListHelper> MyFavoriteColors { get; set; }
    public int[] selectedColors { get; set; }
}

public class CheckBoxListHelper
{
    public int Value { get; set; }
    public string Text { get; set; }
    public bool IsChecked { get; set; }
}
The UserModal class represents user information, including a list of favorite colors, and an array to store the selected colors.
Step 2: Create a Controller
Next, we'll create a controller named UserController. This controller will handle the user interface and interactions with our checkbox list.
public class UserController : Controller
{
    private ForTestingEntities db = new ForTestingEntities();

    public ActionResult Index()
    {
        UserModal user = new UserModal();
        user.MyFavoriteColors = getColorData();
        return View(user);
    }

    [HttpPost]
    public ActionResult Index(UserModal user)
    {
        return View(user);
    }

    public List<CheckBoxListHelper> getColorData()
    {
        List<CheckBoxListHelper> colors = new List<CheckBoxListHelper>()
        {
            new CheckBoxListHelper {Value=1,Text="Red",IsChecked=true },
            new CheckBoxListHelper {Value=2,Text="Green",IsChecked=false },
            new CheckBoxListHelper {Value=3,Text="Blue",IsChecked=false },
            new CheckBoxListHelper {Value=4,Text="Yellow",IsChecked=false},
            new CheckBoxListHelper {Value=5,Text="Black",IsChecked=false },
        };

        return colors;
    }
}
The Index action method serves as the entry point for our view and initializes the UserModal object with the checkbox list data.
Step 3: Create a View
Now, let's create the view for our checkbox list. This view will display user information, including the checkbox list.
@using (Html.BeginForm())
{
    <div class="form-group">
        @Html.LabelFor(model => model.Name)
        @Html.TextBoxFor(model => model.Name, new { @class = "form-control", title = "Enter your full name" })
    </div>

    <div class="form-group">
        @Html.LabelFor(model => model.Email)
        @Html.TextBoxFor(model => model.Email, new { @class = "form-control", title = "Enter your email address" })
    </div>

    <div class="form-group">
        @Html.LabelFor(model => model.Age)
        @Html.TextBoxFor(model => model.Age, new { @class = "form-control", title = "Enter your age" })
    </div>

    <table>
        <tr>
            @foreach (var item in Model.MyFavoriteColors)
            {
                <td style="padding:5px;">
                    <label><input type="checkbox" value="@item.Value" checked="@item.IsChecked" name="selectedColors" id="@item.Value" /> @Html.Raw(@item.Text)</label>
                </td>
            }
        </tr>
    </table>

    <input type="submit" value="Submit" class="btn btn-primary" />
}
In this view, we use HTML helpers to render form elements and iterate through the MyFavoriteColors list to create checkboxes for each color option. The checked attribute is set based on the IsChecked property of each color.
Note:
.png)
Make CheckBoxList in .Net MVC Demo :

