FileUpload in ASP.Net MVC
Uploading files is the one of the most common feature required in websites and application. The most common question while learning programming is How to upload files in website or application. In this tutorial we will learn How to upload files in ASP.NET MVC with example and demo. Procedure of uploading files in asp .net mvc is quite different from uploading files in asp .net webforms.
Step1: Setup up form for uploading file:
    @using (Html.BeginForm("Index", "Home", FormMethod.Post, new { enctype = "multipart/form-data" }))
    {
    @Html.ValidationSummary();


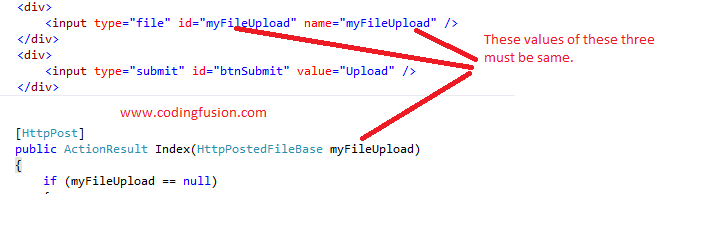
        <%----- Value in "id" and "name" must be same -----%>


    }

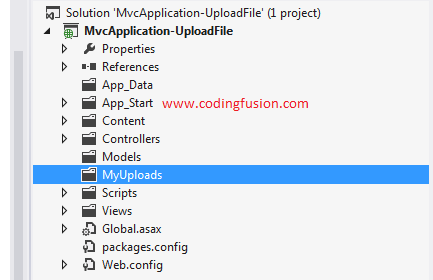
Step2: Create a new folder to upload files
Create a new folder inside your application to
upload files.

Step3: Create a Controller Method to upload file:
        [HttpPost]
        public ActionResult Index(HttpPostedFileBase myFileUpload)
        {
            //---- Check if control has file or not
            if (myFileUpload == null)
            {
                ModelState.AddModelError("file", "Please select file to upload.");
            }
            else
            {
                var pathToSave = Server.MapPath("~/MyUploads/") + myFileUpload.FileName;
                myFileUpload.SaveAs(pathToSave);
                ModelState.AddModelError("file", "File Successfully saved");
            }
            return View();
        }
Important points to remember while upload files in ASP.NET MVC:
- Ignore using "Id" attribute in file upload control, use "name" attribute instead.
- If you are using "Id" attribute in file upload control make sure it has same value as in "name" attribute.
- Value in "name" attribute used in file control must match with the "HttpPostedFileBase" variable created in controller method.

FileUpload in ASP.Net MVC Demo:

