This asp .net tutorial will explains about how to add insert update delete using entity framework database first in asp net-a step by step example. We will follow step by step process from creating database, generating entities and then we will perform insert, update and delete operations using entity framework.
I have previously used entity framework in my tutorial Repeater Edit,Update,Delete using entity framework in Asp .net. I have got lots of emails and comments regarding Entity Framework usage. So I decide to write an step by step tutorial using asp .net entity framework.
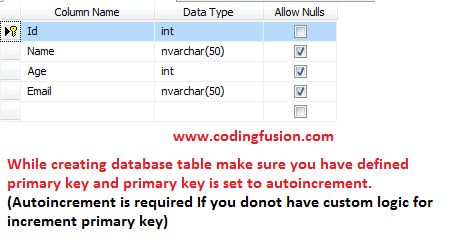
Step1: We will start by creating a database table. Here I have created table named "Student".
CREATE TABLE [dbo].[Student](
	[Id] [int] IDENTITY(1,1) NOT NULL,
	[Name] [nvarchar](50) NULL,
	[Age] [int] NULL,
	[Email] [nvarchar](50) NULL,
 CONSTRAINT [PK_Student] PRIMARY KEY CLUSTERED
(
	[Id] ASC
)WITH (PAD_INDEX  = OFF, STATISTICS_NORECOMPUTE  = OFF, IGNORE_DUP_KEY = OFF,
ALLOW_ROW_LOCKS  = ON, ALLOW_PAGE_LOCKS  = ON) ON [PRIMARY]
) ON [PRIMARY]
Step2: Create a new asp .net website.
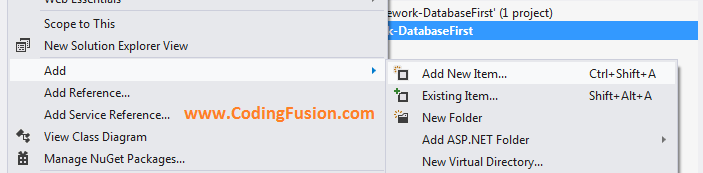
Step3: Go to solution explorer. Right click and then select "Add" then "Add new Item".
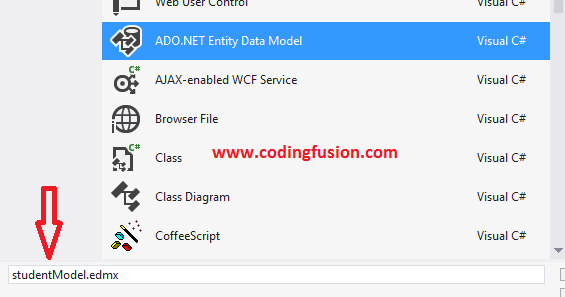
Step4: Choose ADO.Net Entity Data Model from the list. (You can rename if you like)
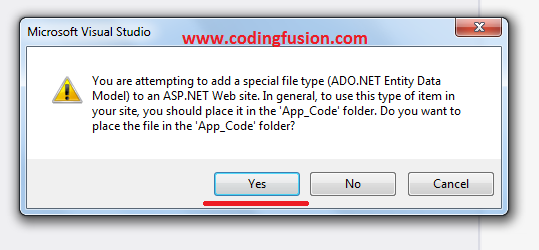
After Clicking Next. You will see warning window like. Just ignore the message and press Yes.
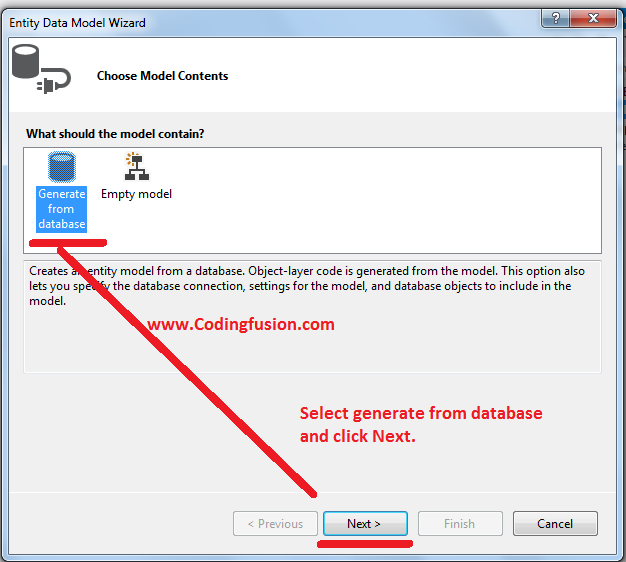
Step5: Select generate from database and click "Next".
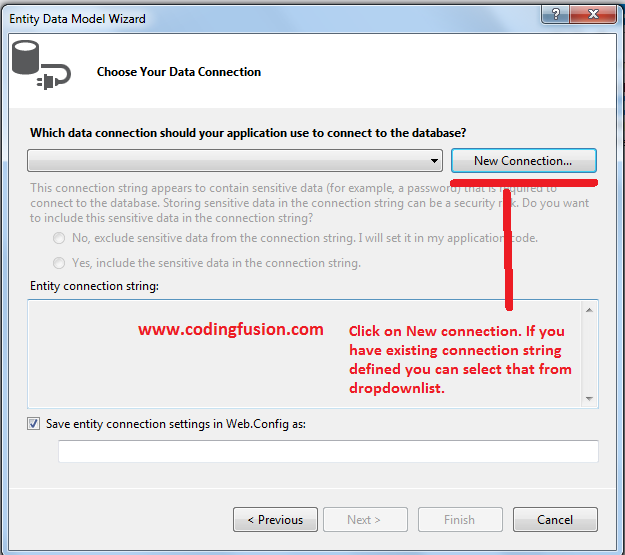
Step6: Click on "New Connection".
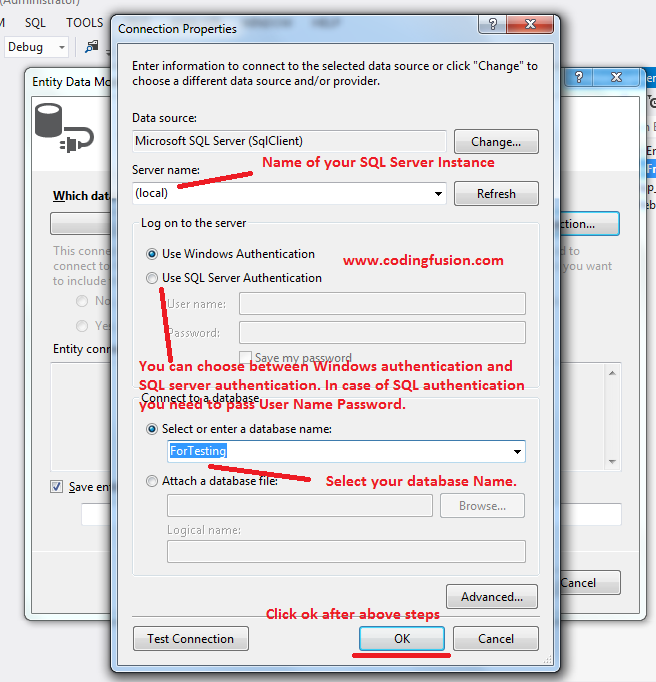
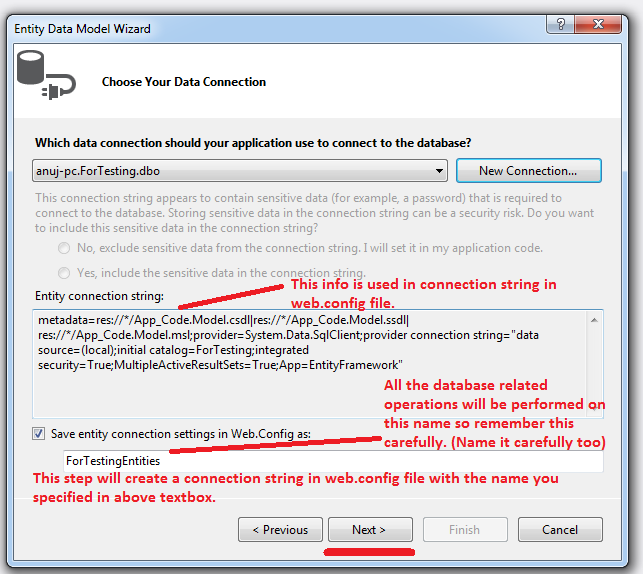
Step7: Add SQL Server credentials and database information. Then click "Ok".
Step8: After clicking Ok you will see new window having information of connection string generated from previous step. Also this step provide you an option to rename your connection string.
Step9: Choose Tables, Views, Stored Procedures and Functions you want to use in your project.
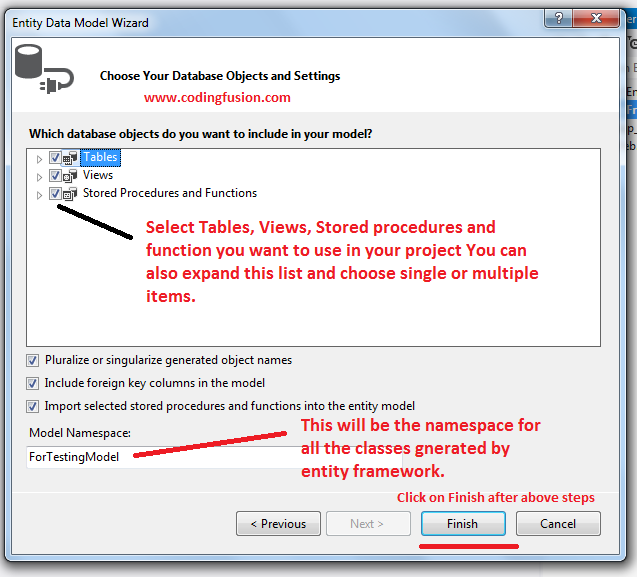
Click Finish. You will see following new files in your project's solution explorer.
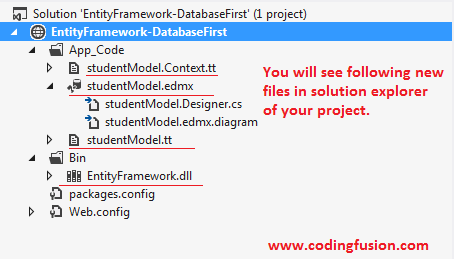
Now we have successfully integrated database with our project. Let's work on insert, update and delete operations.
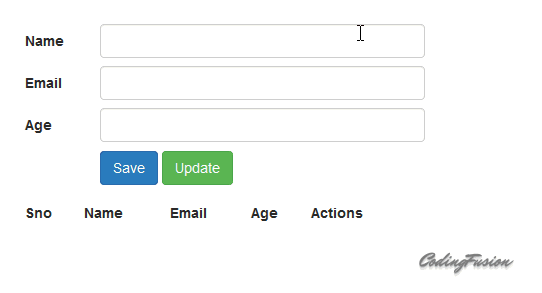
Create an new Page in your website and add following HTML into page:
|
<%-------- Label to print messages ------%>
|
| Name |
|
| Email |
|
| Age |
|
| |
|
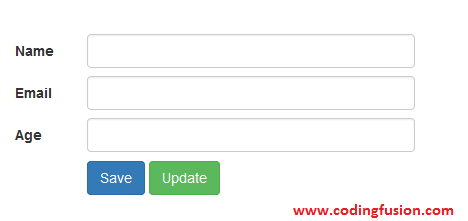
Note: I have not provided any CSS used in this example. (Bootstrap is used as CSS)
Save button Click:
 protected void btnSave_Click(object sender, EventArgs e)
    {
        //---- Create object of our entities class.
        using (ForTestingEntities context = new ForTestingEntities())
        {
            //--- Create object of student class.
            Student obj = new Student();

            //--- Add values to object.
            obj.Name = txtName.Text;
            obj.Email = txtEmail.Text;
            obj.Age = Convert.ToInt32(txtAge.Text);

            //--- Save values to database.
            context.Students.Add(obj);
            context.SaveChanges();
        }

        //--- Bind data to repeater.
        bindStudentInfo();

        //--- Show confirmation message in label.
        lblInfoMessage.Text = "Record successfully saved.";

        //--- Clear text from textboxes
        clearFormFields();

    }
ClearFormFields() Method:
  public void clearFormFields()
    {
        txtAge.Text = string.Empty;
        txtEmail.Text = string.Empty;
        txtName.Text = string.Empty;
    }
Create repeater Control:
| Sno |
Name |
Email |
Age |
Actions |
| <%#Container.ItemIndex+1%> |
<%#Eval("Name") %> |
<%#Eval("Email") %> |
<%#Eval("Age") %> |
|
bindStudentInfo() Method:
public void bindStudentInfo()
    {
        //---- Create object of our entities class.
        using (ForTestingEntities context = new ForTestingEntities())
        {
            repStudentInfo.DataSource = (from r in context.Students select r).ToList();
            repStudentInfo.DataBind();
        }
    }
Edit and Delete operations:
We will perform edit and delete operations inside Itemcommand of repeater control:
 protected void repStudentInfo_ItemCommand(object source, RepeaterCommandEventArgs e)
    {
        //-- Get id of the selected id from command argument property.
        int id = Convert.ToInt32(e.CommandArgument);

        //--- Delete operation
        if (e.CommandName == "Delete")
        {
            using (ForTestingEntities context = new ForTestingEntities())
            {
                //--- get information of selected record in student object.
                Student obj = context.Students.FirstOrDefault(r => r.Id == id);

                //--- Remove record
                context.Students.Remove(obj);
                context.SaveChanges();

                //-- Rebind repeater with updated data
                bindStudentInfo();

            }
        }
        //--- Edit record. We bind values to textboxex
        else if (e.CommandName == "Edit")
        {
            //--- save id into viewstate to use later during update process.
            ViewState["selectedRec"] = id.ToString();

            using (ForTestingEntities context = new ForTestingEntities())
            {
                //--- get information of selected record in student object.
                Student obj = context.Students.FirstOrDefault(r => r.Id == id);

                //--- Insert values into textboxes.
                txtAge.Text = obj.Age.ToString();
                txtName.Text = obj.Name;
                txtEmail.Text = obj.Email;
            }
        }
    }
Update Button Click:
 protected void btnUpdate_Click(object sender, EventArgs e)
    {
        using (ForTestingEntities context = new ForTestingEntities())
        {
            //--- get id of selected record. we have saved it in view state during edit process.
            int id = Convert.ToInt32(ViewState["selectedRec"]);

            //--- get information of selected record in student object.
            Student obj = context.Students.FirstOrDefault(r => r.Id == id);

            //--- update object with new information.
            //--- Add values to object.
            obj.Name = txtName.Text;
            obj.Email = txtEmail.Text;
            obj.Age = Convert.ToInt32(txtAge.Text);

            //--- Update values.
            context.SaveChanges();

        }

        //--- Bind data to repeater.
        bindStudentInfo();

        //--- Show confirmation message in label.
        lblInfoMessage.Text = "Record successfully updated.";

        //--- Clear text from textboxes
        clearFormFields();
    }
Bind data in repeater on Page_Load()
if (!Page.IsPostBack)
        {
            bindStudentInfo();
        }
Demo add insert update delete using entity framework database first in asp net